Instrument Management Overview
Table of Contents
Navigating your Inventory
- Searching for Instruments
- Editing Instruments
- Exporting your Instrument Data
- QR Codes & Case Tags
- Repairs, Inspections, and Locations
- Retiring and Deleting Instruments
- District Administrators: District Level Functions
For detailed information on managing your instrument assignments, please click here.
Navigating your Inventory
Searching for Instruments
On the Instruments page, you will see the instruments default to score order, and you have several options to sort and filter. As you begin typing, your filters will narrow down what items come up in your search.
To search for an individual instrument, you can filter for:
- Serial #
- Owner Identifier
- Case ID
-
Barcode (and if you have the "Manage Assignments & Inspections" toggle off, you can also use the Barcode Search option)
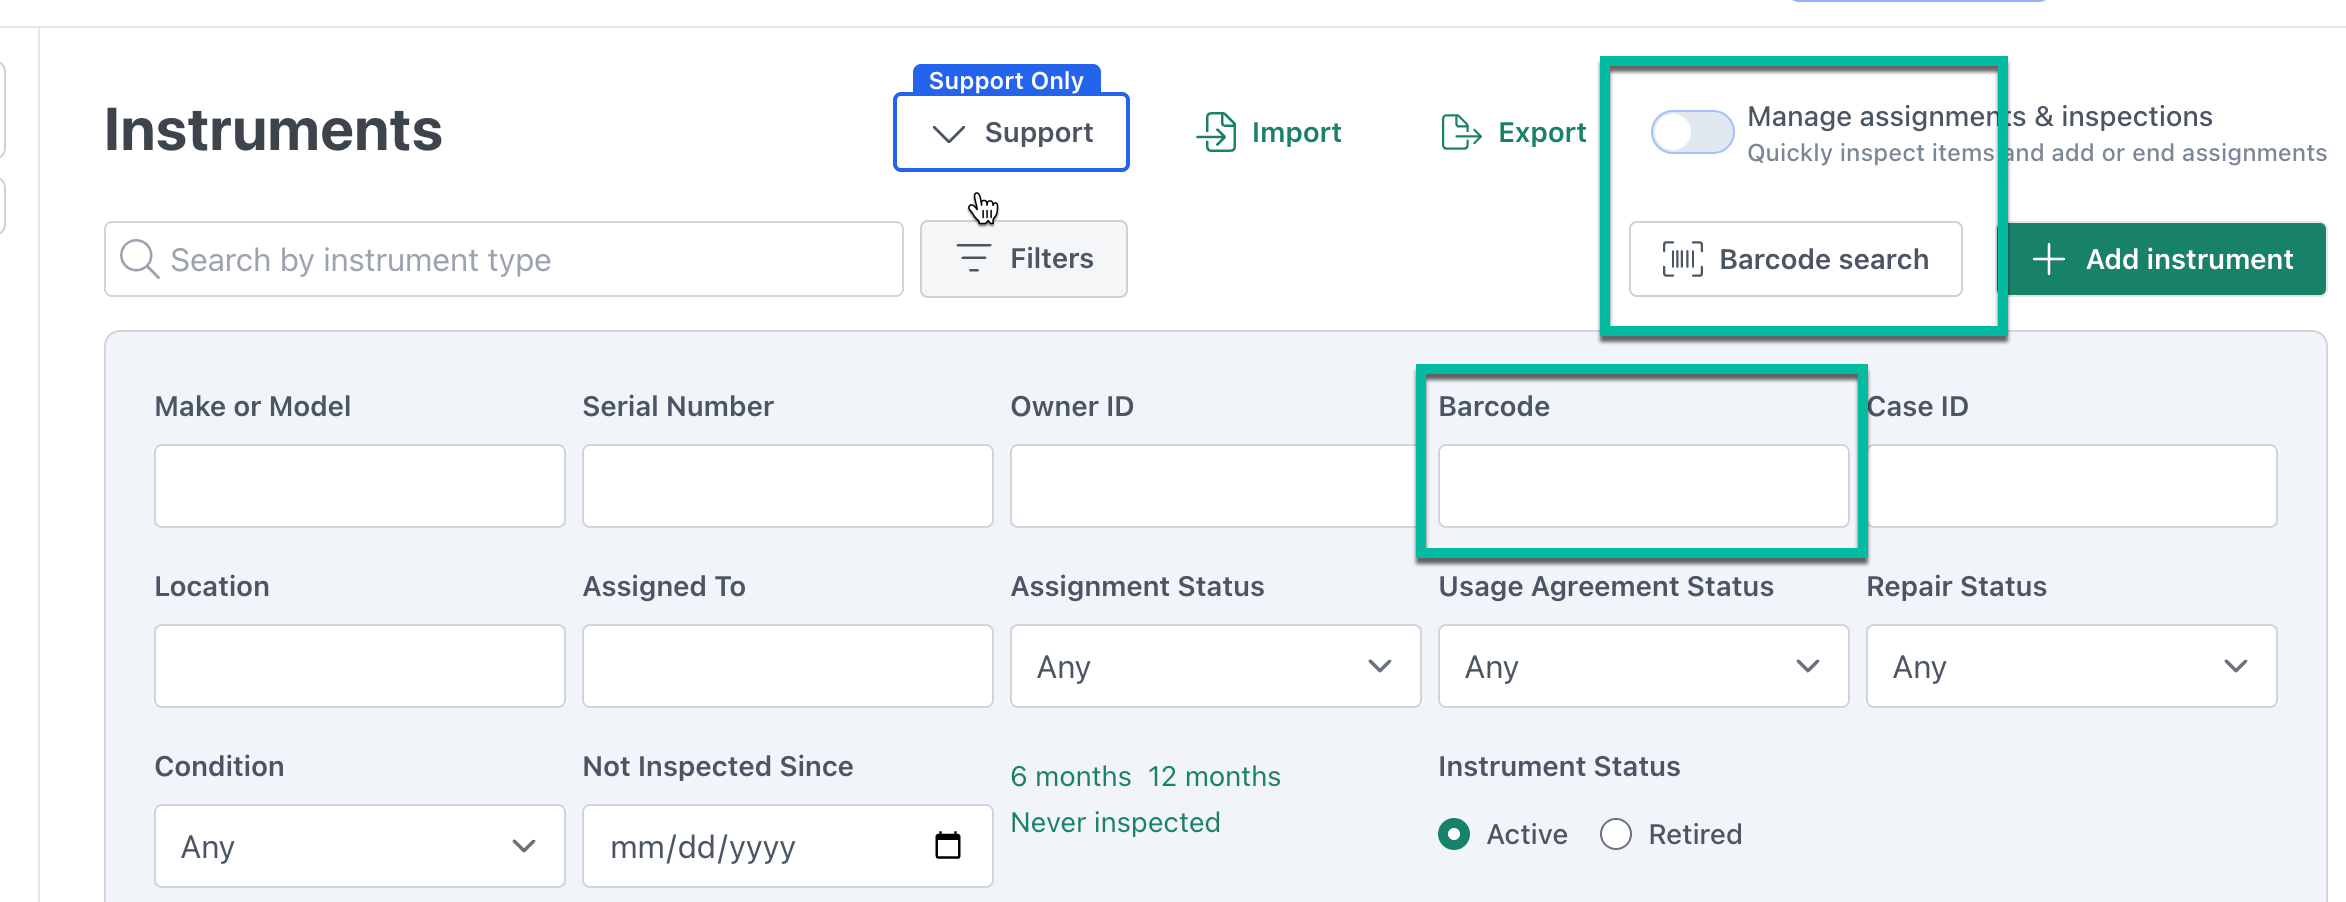

To search for a group of instruments, you can filter for:
- Make or Model
- Type
- Purchase Year
- Location
- Condition (this is populated by the last inspection condition)
- Unassigned instruments
- Inspection dates - with options for "not inspected" in 6 months, 12 months, or never inspected.
To search by assignment, you can filter for:
- Student Assignment
- Assignment Status
- Usage Agreement Status
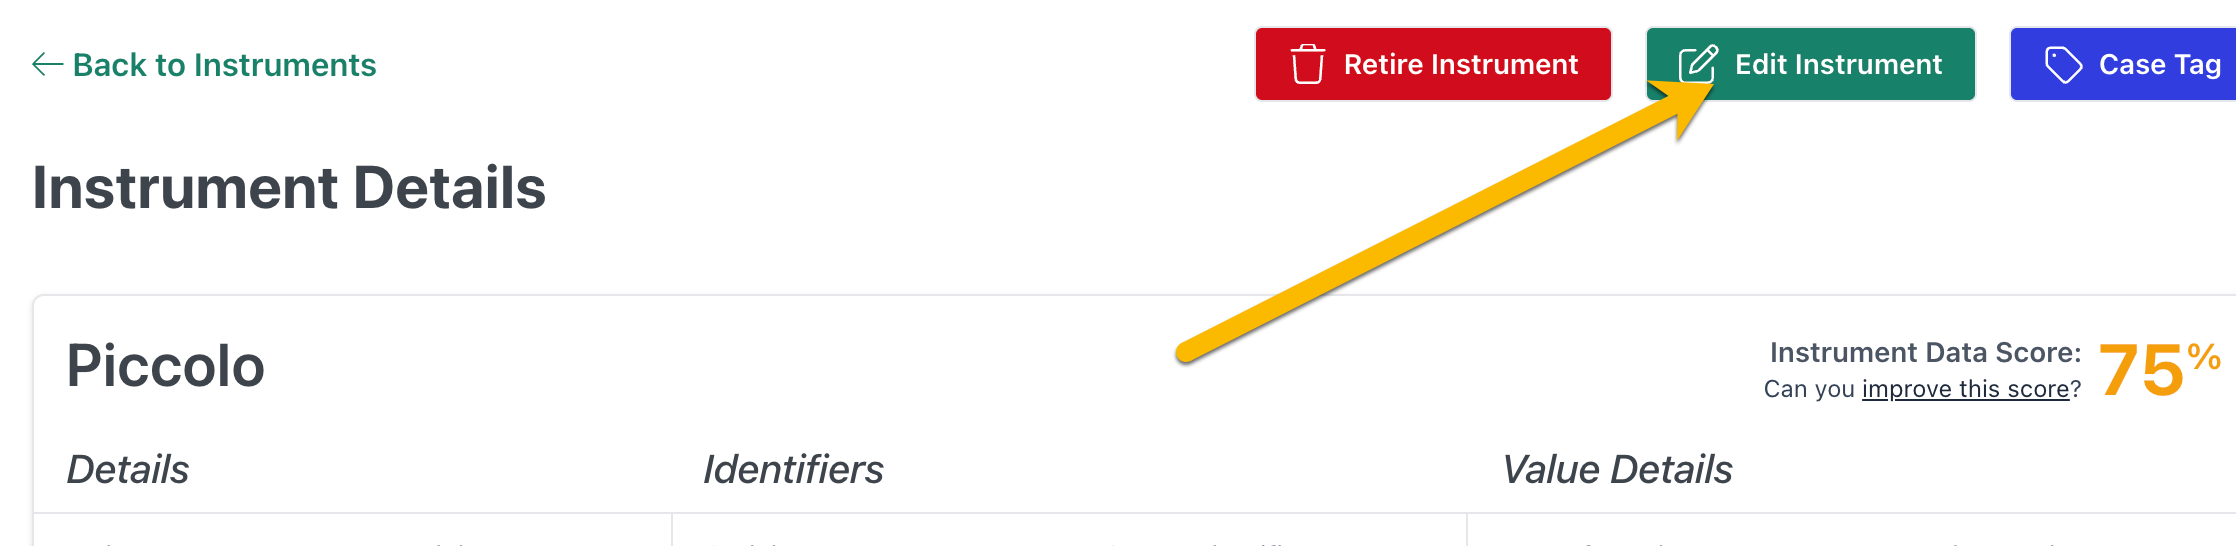
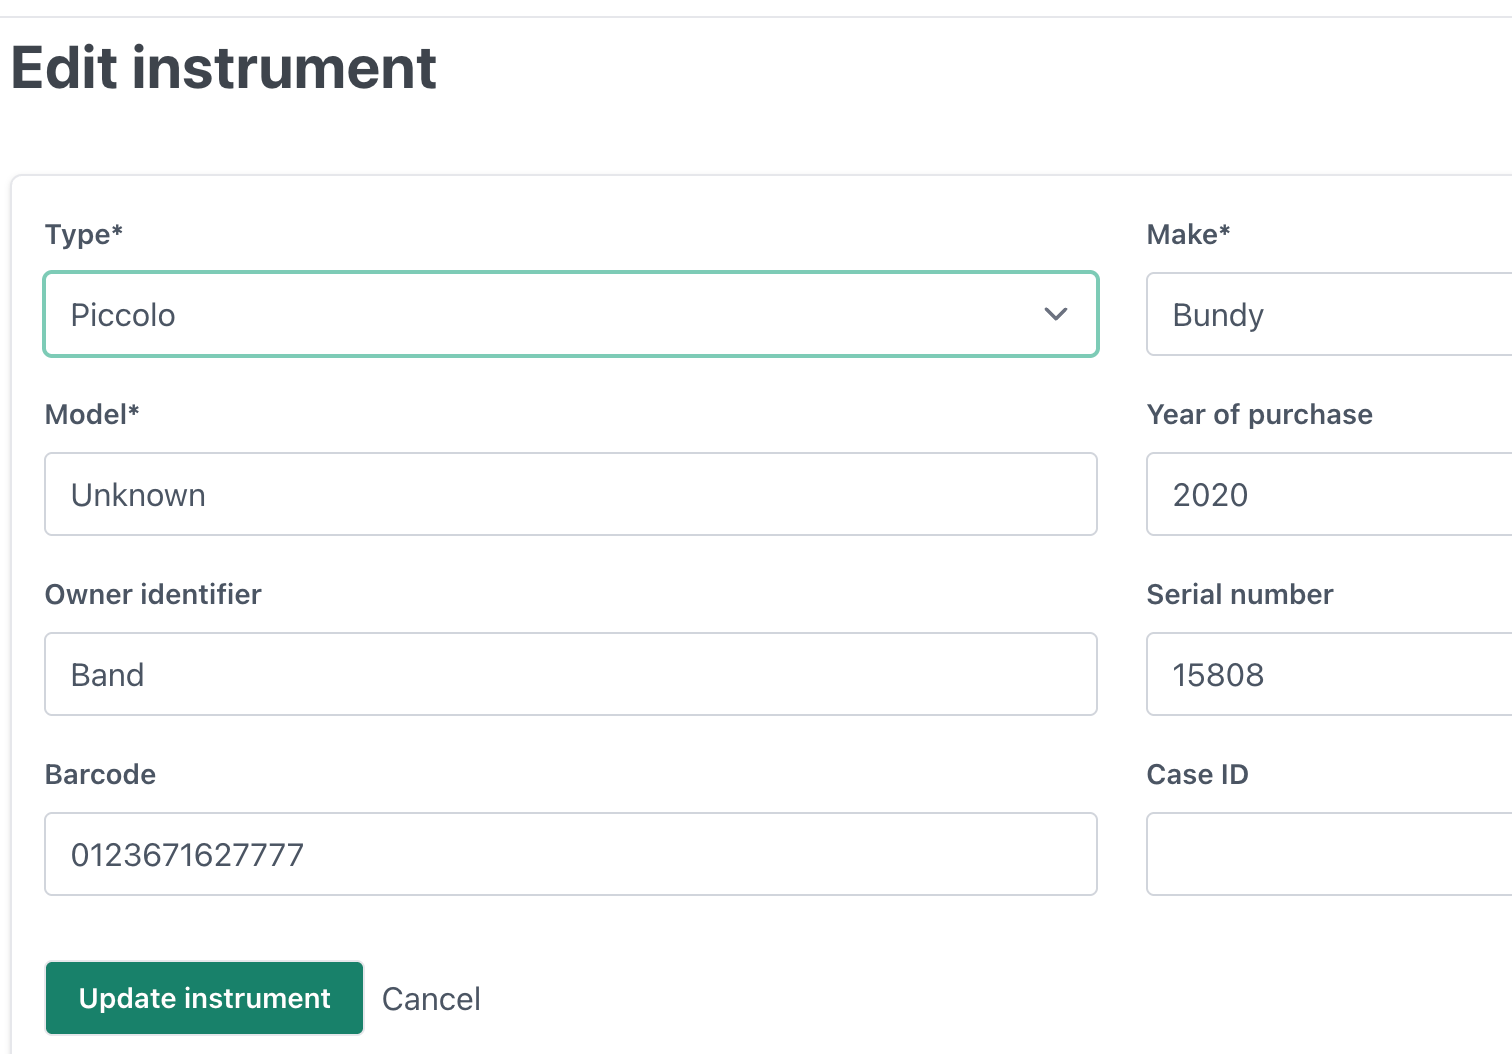
Editing Instruments
Click through on an Instrument's details page to fin the "Edit Instrument" button on the top right.
In the editing page, you can adjust the Type and subtype, Make, Model, Year of Purchase, Owner Identifier, Serial Number, Barcode, and Case ID for this item.
Exporting your Instrument Data
Click "Export" to download an excel sheet (xlsx format) with your instrument data using "Select all fields" option or just based on fields you select. Next time you click ""Export, it will 'remember' and display your previous field selections.

Assignment Details will include any and all assigned members for your items!
QR Codes & Case Tags
On an Instrument Details page, click the "Case Tag" button to bring up that instrument's case tag. Clicking "Print Case Tag" will allow you to print a business card sized QR Code Tag.

See our Bulk Printing Case Tags doc for a walkthrough on printing these out for your full inventory!
When scanned with a capable device, that QR code will bring up a page with contact information and a sign in link for the instrument's manager.

Updating The Case Tag Contact
When scanned with a compatible device, the QR code will direct the user to a page displaying contact information to assist in the recovery of a lost or found instrument.

By default, this information is sourced from the first user assigned the "Teacher" role.
If you would prefer a different user's contact information to appear on this page, a workaround is available.
At the district level:
- Go to Users
- Select the User you want as the case tag contact
- Edit the user and make this user the primary contact for his/her program
- Hit the Save button
This will ensure their contact details appear as the primary point of contact when the QR code is scanned.
Any user, Administrator, Teacher, or Booster, who has been selected as the primary contact user can appear as the case tag contact.
Repairs, Inspections, and Locations
Repairs
On the Instrument Details page of the instrument you'd like to add a repair log to, scroll down to the Repairs section and click the "Add repair" button.
Enter the Vendor, Cost, Details, and Started on date. If there is no end date, it will be considered an Active repair when saved. When or if that repair is complete, enter the end date and click "Save" so it will be considered a "Completed" repair in CutTime.
Up to three documents can be added to each repair log for the instrument by clicking the "Add Documents" option on the repair log.
Repairs can be fully edited by clicking "Edit" next to the repair.
To learn more about repair definitions, click here.
Inspections
On the Instrument Details page of the instrument you'd like to add an inspection to, scroll down to the Inspections section and click the "Add inspection" button.
Select the applicable condition from the dropdown, add any further comments, and select the "Inspected on" if it is different than the day you are logging this inspection. Click "Add an inspection" to update this instrument's condition!
Inspection Comments can be edited by clicking "Edit" next to the inspections. The inspected by, Condition, and the inspected date cannot be edited after logging the inspection.
To learn more about inspections and condition definitions, click here.
Locations
On the Instrument Details page of the instrument you'd like to add or update the location, scroll down to the Locations section and click the "Add new Location" or the "Update Location" button.
You can select a new location for this instrument from the options in the dropdown menu.
See our Storage Locations help document for more information on managing those locations!
Audits
The district can create an audit request for your program to review all of your organizations' instruments. This audit helps ensure that every instrument in your organization is accounted for, in good condition, and ready for members to use. You'll review each instrument, verify the condition, and note any maintenance or replacement needs.
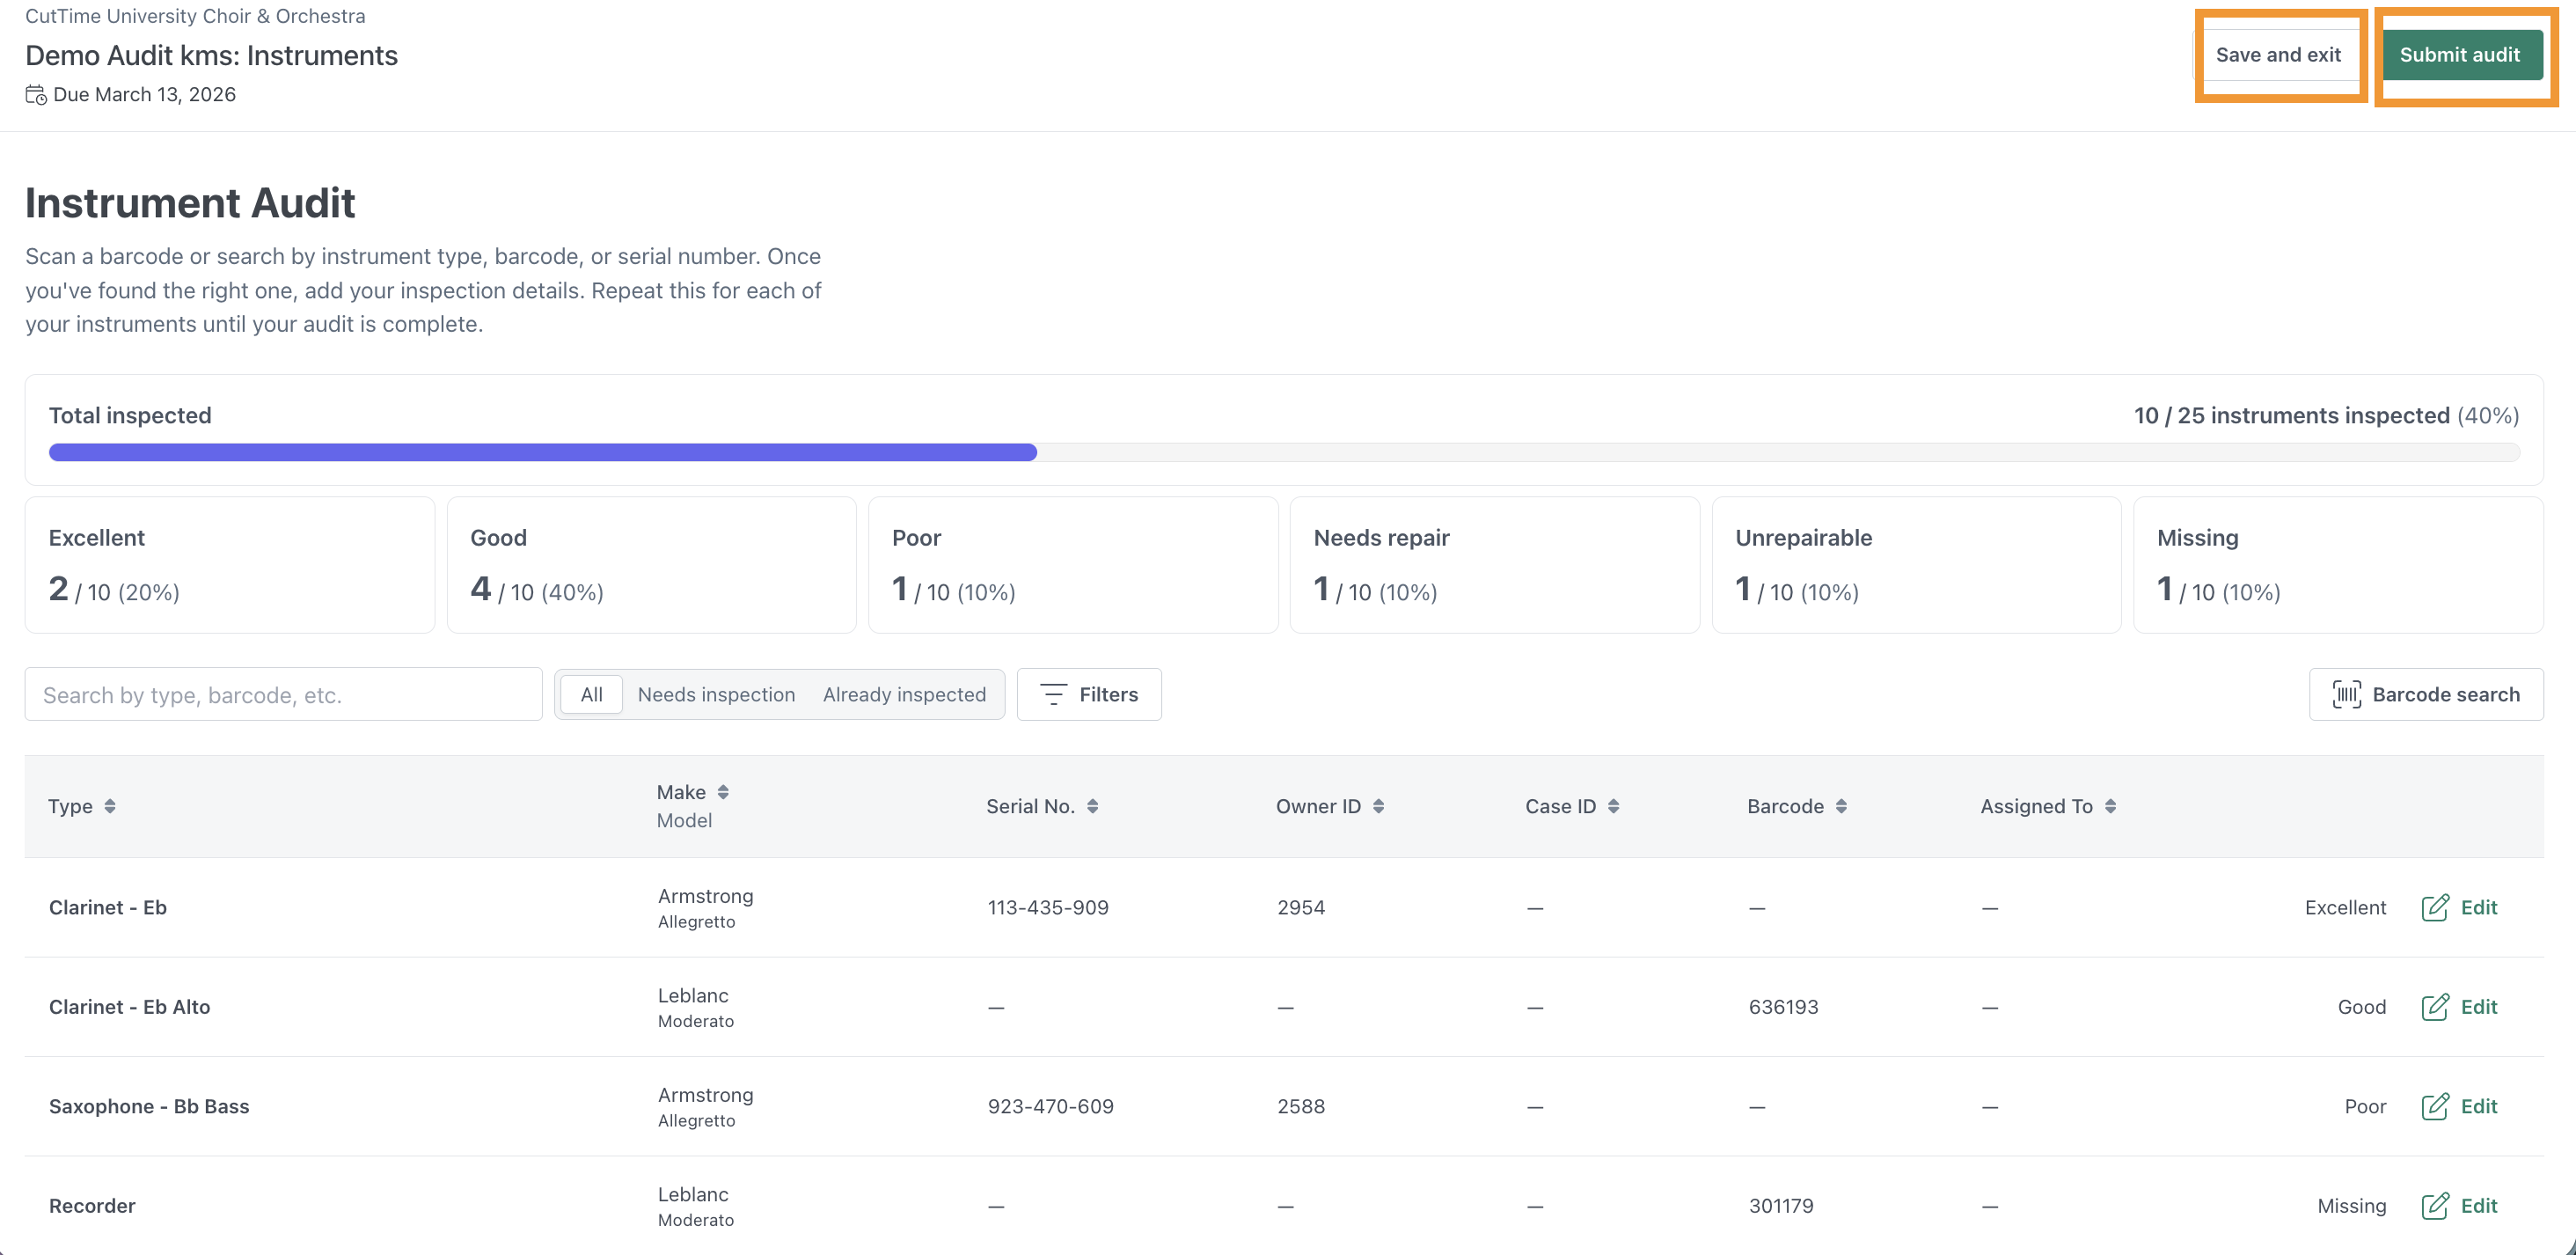
On the CutTime menu page under the Inventory subsection, select Audits to complete a district implemented audit for your program. The top bar tabulates the instruments into categories for quick reference.

Click the "Start" button next to the audit that is listed. After reading some of the audit instructions, click "Start Audit" to begin the process. Your inventory will be listed with a an option "+ Add inspection" on each instrument line. Select "+Add Inspection," which will open a popup menu to be completed for each instrument. Select the condition of the instrument. If the condition is "poor, needs repair, or unrepairable," a written comment is required. Also, there is an option to upload a picture of the instrument verifying its condition. When finished, select the "Save" button. See below.

After you complete an audit of each instrument, you can either "Save and Exit" if you need more time to complete the audit, or you can select "Submit" when you have finished. The district admin can view audit in process or completed.
Retiring and Deleting Instruments
Retiring Instruments
On an Instrument Details page, you may have the option to "Retire Instrument." Retiring an instrument means that instrument is removed from your instrument list and is archived in the CutTime database. If you need to retrieve data related to that instrument after retiring it, reach out to support@gocuttime.com for assistance.
If the "Retire Instruments" button does not appear on the instrument details page, you can send your instrument's unique serial #, Owner ID, Barcode, or Case ID to your district-level administrator, and they can retire that instrument for you.
District Administrators
Retire Instruments: As the district-level administrator, you can log into your district dashboard and can go to your Instruments page.
- Search for the instrument using the serial #, Owner ID, Barcode, or Case ID, and click that instrument when you find it.
- Click the "Retire Instrument" button.
- Finally, add the reason for retirement and click "Save."
Deleting Instruments
In the case of a duplicate or incorrect instrument entry, you can contact Support@gocuttime.com to remove that incorrect data. When applicable, please ensure the appropriate parties are notified of any data changes.
Audits
To learn more about how to initiate and/or complete a District Audit, read here.
Relevant Blog Articles: